 Andrey Agibalov
 A good way to verify application quality is end-to-end testing (E2E testing). While unit tests verify that pieces of code work correctly, E2E tests verify how the system works as a whole — they span the entire application from buttons to database. If unit test is green, well… it does not mean much. If end-to-end test is green, it means that system works to some degree.
Common approach
Both Angular and AngularJS have a native E2E testing solution called Protractor. The common approach to implement E2E testing is to put all tests into a stand-alone application which you you would run against the shared QA environment. With this approach, your tests are 100% external to the system under test, which on one hand makes you “a real user”, but on the other hand it limits the number of ways you can interact with the system to just one — user interface. There are few well-known difficulties with this approach:
- “Given” test parts are always hard. How would you go about “given that I’m a user who have registered more than 10 years ago and posted at least 300 comments since then”? It is very unlikely that your application exposes the UI for backdating.
- If you’re running your tests against the shared environment, there are chances that someone else’s activities will interfere with your tests and give you a false negative (or positive!) result.
- If you can’t run your tests locally (against your local version of the application), you can’t run tests before you actually push your changes to the repository and deploy the new version.
Lightweight approach
Lightweight E2E testing approach helps to overcome the difficulties and addresses the concerns mentioned above by moving E2E tests “closer” to the system under test:
- Your tests have full access to server-side internals, so you can do virtually anything to implement the “given” part of the test. You can put data directly to the database, or even replace database with a mock.
- No one can interfere with your tests, because you run everything locally on your machine.
- You can run tests before deploying your changes anywhere. Because everything you need is there on your machine.
Every lightweight E2E test follows this pattern:
- Construct and launch the new application instance, configure it, inject stubs, mocks and spies as you wish.
- Interact with application as a real user would — use the browser programmatically to push buttons.
- Verify if external and/or internal effects are as expected. Inside a single test interact with both UI elements and server internals.
To implement this pattern, we’re going to use Spring Boot and WebDriver. Spring Boot provides a number of features that deliver the great testing experience by making it easy to run the entire application locally and get access to both its internals (Spring beans) and externals (HTTP). Selenium WebDriver gives you a 100% real browser which you can use programmatically. Protractor is basically a WebDriver with a number of Angular-specific enhancements. We’re also going to use WebDriverManager — a nice Java library that downloads and installs ChromeDriver.
Sample application
To understand what lightweight E2E tests can do, we’ll use a primitive “todo list” application. It’s a typical single-page application with front end built using Angular and back end built using Spring Boot.
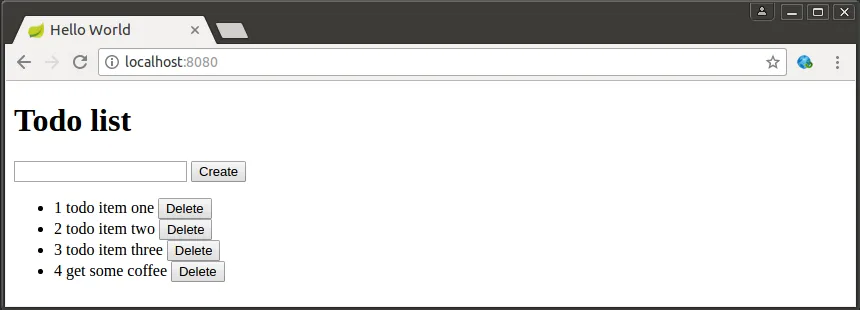
You create a new todo item by typing text and clicking “Create”. Right after it, the list of items gets reloaded from server. You delete an existing item by clicking “Delete” button next to it. Again, the list of items gets reloaded after it.
Example #1: A browser-only test
The first example to take a look at is a browser-only test. We launch a clean application instance and use the browser to create a new todo item. This is how a very typical “external” E2E test looks like.
@Test
public void canCreateATodo() {
  // GIVEN there are no todos

  // WHEN I create one
  webDriver.get("http://localhost:8080/");
  webDriver.findElement(By.cssSelector("input")).sendKeys("test todo");
  webDriver.findElement(By.cssSelector("button[type=submit]")).click();

  // THEN it appears on the list
  WebElement ul = webDriver.findElement(By.cssSelector("ul"));
  List<WebElement> liElements = ul.findElements(By.cssSelector("li"));
  assertEquals(1, liElements.size());
  assertTrue(liElements.get(0).getText().contains("test todo"));
}
Note that in this example we don’t interact with any server-side components directly.
Example #2: A browser + Spring bean test
Now let’s consider and example where we verify how the “Delete” buttons work. To delete things we obviously need to create those things first. Let’s create a few todo items using the todoRepository.
@Autowired
private TodoRepository todoRepository;

@Test
public void canDeleteATodo() {
  // GIVEN there are 3 todos
  todoRepository.save(Arrays.asList(
    makeTodo("todo one"),
    makeTodo("todo two"),
    makeTodo("todo three")
  ));

  webDriver.get("http://localhost:8080/");
  WebElement ul = webDriver.findElement(By.cssSelector("ul"));
  List<WebElement> liElements = ul.findElements(By.cssSelector("li"));
  assertEquals(3, liElements.size());

  // WHEN I delete 1 ("todo two")
  liElements.get(1).findElement(By.cssSelector("button")).click();

  // THEN 2 todos still remain in the browser...
  liElements = ul.findElements(By.cssSelector("li"));
  assertEquals(2, liElements.size());
  assertTrue(liElements.get(0).getText().contains("todo one"));
  assertTrue(liElements.get(1).getText().contains("todo three"));

  // ...and in the database
  assertEquals(2, todoRepository.count());
}
It would be much more difficult to create the same 3 todos using the UI — first it would take us time to write the locate-type-click code and then this test would take longer time to run.
Example #3: A browser + Spring mock test
This example shows how we can go even farther and replace the real todoRepository with a mock object just for one test.
@MockBean
private TodoRepository todoRepository;

@Test
public void canMakeSureThereAre3Todos() {
  // GIVEN there are 3 todos
  given(todoRepository.findAll()).willReturn(Arrays.asList(
    makeTodo(111, "mock data one"),
    makeTodo(222, "mock data two"),
    makeTodo(333, "mock data three")
  ));

  // WHEN I open the browser
  webDriver.get("http://localhost:8080/");

  // THEN indeed I see those 3 todos
  WebElement ul = webDriver.findElement(By.cssSelector("ul"));
  List<WebElement> liElements = ul.findElements(By.cssSelector("li"));
  assertEquals(3, liElements.size());
  assertTrue(liElements.get(0).getText().contains("mock data one"));
  assertTrue(liElements.get(1).getText().contains("mock data two"));
  assertTrue(liElements.get(2).getText().contains("mock data three"));
}
Conclusion
Lightweight end-to-end testing is a powerful technique that allows developers to verify how both the new and old features work. Even though the described approach relies on Spring Boot, these ideas work for virtually any technology stack as long as that stack allows running the application programmatically.
Here is the repository.